Rodent control: A homeowner's step-by-step guide
By Kiss János 16 min read
Why traps alone don’t solve a rodent problem
Most homeowners catch their first mouse and assume the problem is over.
It usually isn’t.
A single sighting often means a breeding group nearby, and a female house mouse can produce 5 to 10 litters a year.
Effective rodent control follows a sequence that professionals call integrated pest management (IPM). The order matters: inspect, identify, exclude, remove attractants, trap, clean, monitor, and escalate if needed.
Each step makes the next one work better.

Think of it like bailing water out of a leaking boat.
Traps are the bucket.
Rodent exclusion, sealing the gaps that let rodents in, is patching the hole.
If you only bail, new water keeps coming, and reactive trapping without sealing entry points typically leads to a repeat infestation within weeks.
So what’s a realistic timeline? When exclusion is done correctly, most DIY cases resolve in 1 to 3 weeks.
Skip it, and you can trap for months without ever reaching zero.
This guide walks through every step a homeowner can handle in 2026, from reading droppings to choosing the right trap. It also covers the harder question: how to judge when a professional is genuinely worth calling, and how to vet one.
Know your enemy: Mice vs. rats
Here’s what surprises people: the species in your home determines where every trap goes.
A roof rat problem treated like a mouse problem will fail, because you’ll be setting traps on the floor while the rats travel along rafters overhead.
Mice, Norway rats, and roof rats compared
Three rodents cause the vast majority of household infestations in North America and Europe. Their behavior differs enough that a quick identification saves days of wasted effort.
| Trait | House mouse | Norway rat | Roof rat |
|---|---|---|---|
| Adult weight | 0.5 to 1 oz (14 to 28 g) | 7 to 18 oz (200 to 500 g) | 5 to 10 oz (150 to 280 g) |
| Behavior | Curious; nibbles small amounts in many spots | Cautious; burrows in soil near foundations | Cautious; agile climber |
| Typical nesting areas | Wall voids, cabinets, behind appliances, stored boxes | Ground-level burrows, crawl spaces, basements, under slabs | Attics, rooflines, upper walls, dense trees and vines |
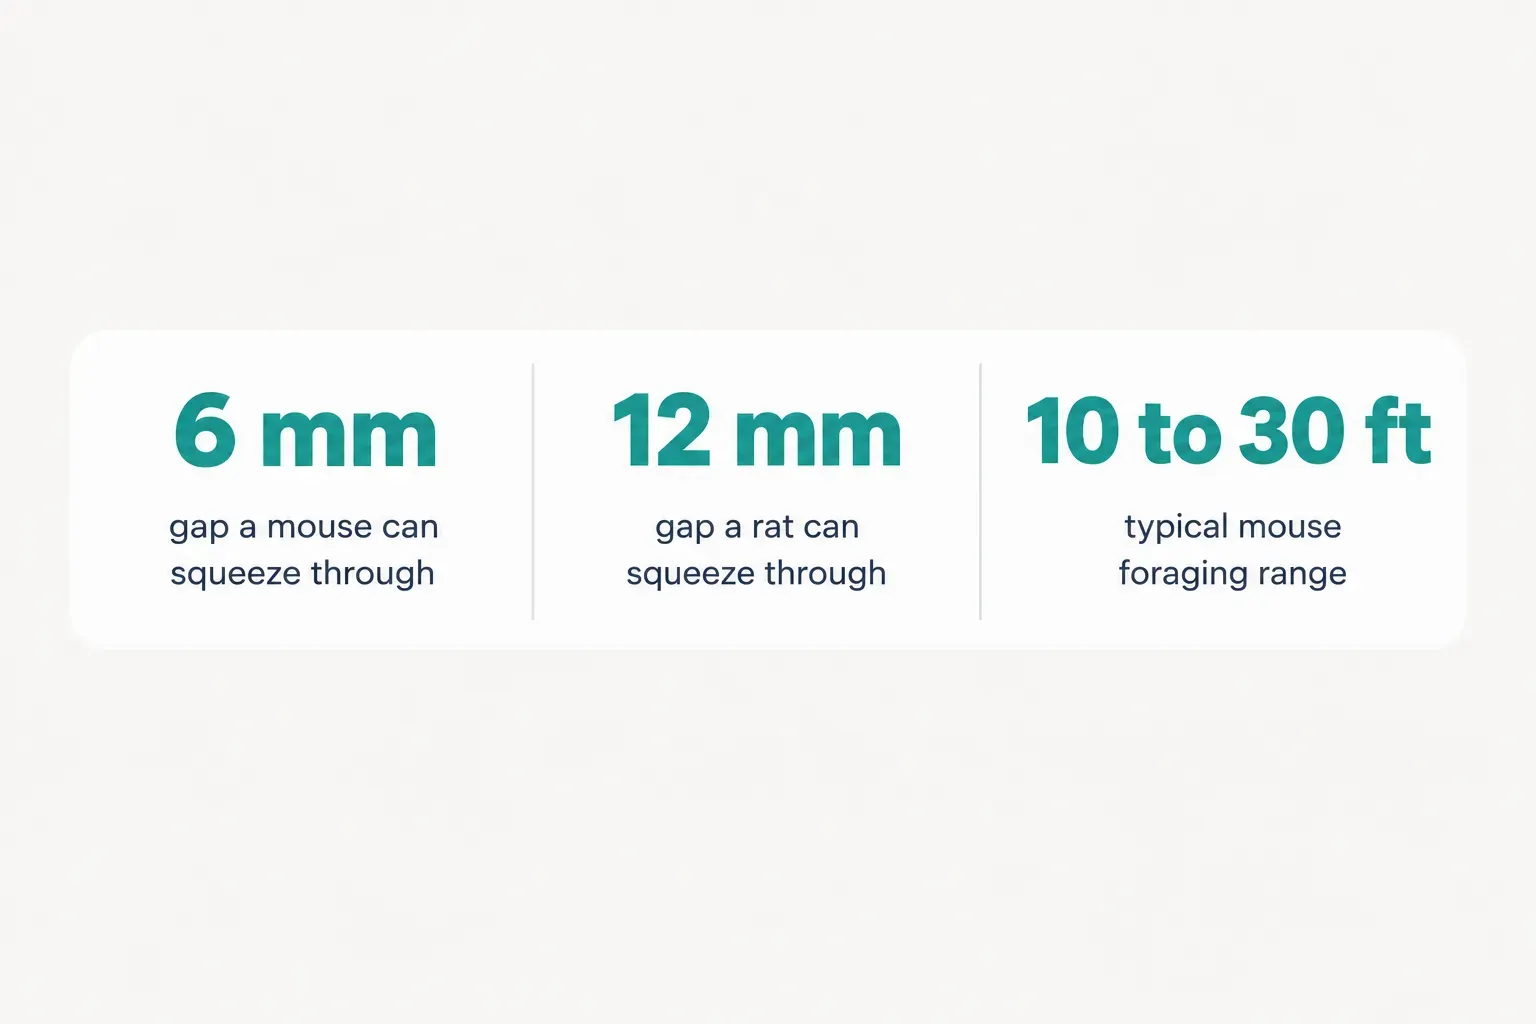
| Foraging range | 10 to 30 feet from nest | 100 to 150 feet from nest | 100 to 300 feet from nest |
| Droppings | About 3 to 6 mm, small and pointed | 12 to 18 mm, large and blunt | About 12 mm, slightly pointed ends |
| Where traps go | Every 6 to 10 feet along walls near activity | Ground level along foundation, basement walls, runways | Attic joists, rafters, upper shelves, fence lines |
The practical takeaway is simple.
Mice need many traps placed close together because they forage in a tight radius. Rats need fewer traps in well-chosen spots, and they often need several days of pre-baiting before they’ll trust anything new.
Fresh signs vs. old evidence
Finding mouse droppings or rat droppings doesn’t automatically mean you have an active problem. You might be looking at evidence from a previous owner.
Learning to tell fresh signs from old ones keeps you from treating a problem that’s already gone, or ignoring one that’s very much alive.
| Evidence | Fresh (active infestation) | Old (possibly past activity) |
|---|---|---|
| Droppings | Moist, dark, shiny, soft like putty | Dry, gray or dull, crumble when touched |
| Gnaw marks | Light-colored exposed wood, sharp edges, fresh debris below | Weathered, darkened wood, smooth edges |
| Grease marks (rub marks) | Dark, smudgy, rub off on a finger | Faded, dusty, hard to smear |
| Nesting material | Soft shredded paper, fabric, or insulation, sometimes warm | Compacted, dusty, abandoned |
| Urine odor | Strong, sharp ammonia smell | Faint, musty, only noticeable up close |
Beyond droppings and gnaw marks, watch for these early warning signs: scratching or scurrying sounds at night (especially in ceilings and walls), dark grease marks along baseboards where rodents brush against surfaces, gnawed food packaging in pantries, and a persistent musky urine smell.
And of course, sighting a live or dead rodent. Mice are nocturnal, so seeing one during the day often signals a population large enough that competition is pushing some out of hiding.
Inspect and seal every entry point
Sealing is the step most people skip, and it’s the one that decides whether your rodent control actually lasts.
Grab a flashlight, a notepad, and a pencil (you’ll use it to test gap sizes). Plan on 60 to 90 minutes for a thorough walk-around of an average home.
Room-by-room checklist
Work from the outside in, then from the bottom up. Mark every gap you find on a simple sketch of the house so you can track repairs.
- Foundation: Walk the full perimeter and look for cracks, gaps where siding meets the foundation, and burrow holes in the soil within 3 feet of the wall. Norway rat burrows are typically 2 to 4 inches wide with smooth, packed edges.
- Roofline and soffits: Check where the roof meets the fascia, gaps in soffit panels, and loose ridge caps. Roof rats and mice both climb siding, downspouts, and overhanging branches to reach these openings.
- Vents: Inspect dryer vents, foundation vents, gable vents, and bathroom exhaust outlets. Missing or torn screens are an open door.
- Utility and pipe penetrations: Look closely where gas lines, water pipes, electrical conduit, cable, and AC refrigerant lines enter the house. Installers often leave oversized holes that are never fully sealed.
- Doors: Check for daylight under exterior doors. If you can see light, a mouse can get through, so install or replace worn door sweeps.
- Garage: Inspect the rubber seal along the bottom of the garage door and the side weatherstripping. Corners where the door meets the frame are a favorite entry for both mice and rats.
- Attic and crawl space: Look for daylight through roof decking, gaps around plumbing stacks, and damaged crawl space doors or vent screens. Check insulation for tunnels, droppings, and flattened runways.
- Interior: Inspect gaps behind the stove, refrigerator, dishwasher, and under sinks where pipes pass through cabinets. These interior gaps connect wall voids to your kitchen.
How small a gap can they use
Rodents have collapsible skeletons, and if their skull fits, the body follows.
The numbers are startlingly small.
- Mice: A quarter-inch (6 mm) gap is enough. That’s roughly the diameter of a standard pencil, which is why the pencil test works: if a pencil slides in, a mouse can too.
- Rats: A half-inch (12 mm) gap, or a hole about the size of a quarter, is enough for a young rat.
Material choice matters as much as finding the gap.
Rodents chew through soft materials easily, and their incisors grow continuously, so they’re motivated chewers. For durable rodent-proofing, use:
- Steel wool plus caulk or sealant: Pack small gaps tightly with coarse steel wool (or copper mesh, which won’t rust), then seal over it with exterior-grade caulk. The metal stops chewing; the caulk holds it in place.
- Hardware cloth: Use 1/4-inch galvanized hardware cloth for vents, crawl space openings, and larger holes. Avoid chicken wire, which has openings big enough for mice.
- Metal flashing and sheet metal: Cover gnawed edges around doors, gaps at the base of siding, and openings around large pipes. Rodents can’t get purchase on smooth metal.
- Concrete or mortar: Fill foundation cracks and larger masonry gaps permanently.
Skip expanding spray foam as a standalone fix. Rodents chew through it in a single night.
If you use it for insulation, back it with steel wool or cover it with metal.
Sealing keeps rodents out.
But removing attractants takes away the reasons they want in, and that’s a separate job called harborage reduction. Cover these food and water sources and shelter spots:
- Trash: Use bins with tight-fitting lids, keep them off the ground if possible, and rinse food residue from containers.
- Pet food: Store kibble in sealed metal or thick plastic containers, and don’t leave bowls out overnight.
- Bird feeders: Spilled seed is one of the most common rat attractants in suburban yards. Move feeders at least 20 feet from the house or remove them during an active infestation.
- Compost: Use an enclosed, rodent-resistant bin and avoid adding meat, dairy, or cooked food.
- Vegetation: Trim shrubs, vines, and tree branches so nothing touches the house, and keep a clear 18-inch strip around the foundation. Remove woodpiles and clutter that offer nesting cover.
- Water: Fix leaky outdoor faucets, drain standing water, and repair dripping pipes under sinks.
Trap, bait, and clean up safely
Once the house is sealed, you’re dealing only with the rodents already inside.
That’s a finite number, and with the right setup, a manageable one.
The choice of trap depends less on preference and more on who else lives in your home.
Snap traps, enclosed traps, or bait stations
Use this decision framework to match the tool to your situation:
- Snap traps are the best choice for open areas like garages, basements, and attics where children and pets can’t reach. They’re cheap, fast, and give immediate confirmation. Place them perpendicular to the wall with the trigger end touching the baseboard, since rodents run along edges.
- Enclosed or covered traps suit homes with children, dogs, or cats. The mechanism sits inside a plastic housing, which protects curious fingers and paws and also hides the carcass from view.
- Tamper-resistant bait stations fit severe infestations and exterior perimeters, especially for Norway rats around foundations. Locked, anchored stations keep bait away from children, pets, and non-target wildlife.
Rodenticides deserve extra caution.
Rodenticide safety isn’t just a recommendation; it’s a legal matter. Keep these risks in mind:
- Secondary poisoning: A poisoned rodent can be eaten by a cat, dog, owl, hawk, or fox, which then ingests the toxin. Anticoagulant baits are a documented cause of raptor deaths, and several jurisdictions have tightened restrictions on second-generation products in recent years.
- Odor from inaccessible carcasses: Poisoned rodents don’t die on cue. They often crawl into wall voids or under floors, and the decomposition smell can last two to three weeks.
- The label is the law: Every rodenticide carries legally binding instructions on placement, quantity, and use. Using a product in a way the label doesn’t allow, such as scattering loose pellets indoors, violates federal pesticide regulations in the US and similar rules elsewhere.
Indoors, traps are almost always the safer, faster choice.
Reserve bait for locked exterior stations.
Why rodents avoid your traps or bait
Set out a dozen traps and caught nothing?
That’s common, and it’s rarely bad luck. Here’s what usually goes wrong and how to fix it:
- Neophobia: Rats in particular are wary of new objects in their territory and may avoid a trap for days. Mice are more curious but can still hesitate.
- Competing food sources: If there’s an open bag of birdseed in the garage, a dab of peanut butter on a trap isn’t very interesting. Remove the competition first.
- Wrong placement: Traps in the middle of a room catch almost nothing. Rodents travel along walls and established runways, so put traps where you found droppings, grease marks, or gnawing.
- Too few traps: For mice, one trap is nowhere near enough. Set them every 6 to 10 feet in active areas, often a dozen or more for a typical kitchen and basement.
- Human scent and stale bait: Wear gloves when handling traps, and refresh bait every few days. Peanut butter, hazelnut spread, or a bit of nesting material like cotton balls often work well.
The fix for wary rodents is pre-baiting.
Place baited traps without setting them for 2 to 3 days. Once rodents are feeding on them confidently, set them all on the same night for the biggest possible catch.
One more thing: peppermint oil and ultrasonic devices are not substitutes for exclusion and trapping.
At best, they’re minor deterrents. Controlled studies on ultrasonic repellers show rodents habituate within days, and peppermint scent fades quickly.
They won’t remove an established population.
Safe droppings and urine cleanup
Rodent droppings, urine, and nesting material can carry hantavirus, salmonella, and leptospirosis.
Hantavirus prevention comes down to one rule: never stir contaminated dust into the air. The virus spreads mainly when dried waste becomes airborne and is inhaled.
Follow the CDC-recommended method for disinfecting rodent waste:
- Ventilate first. Open doors and windows and leave the area for at least 30 minutes before you start.
- Gear up. Wear rubber, latex, or nitrile gloves. In heavily contaminated spaces like attics or sheds, add an N95 respirator.
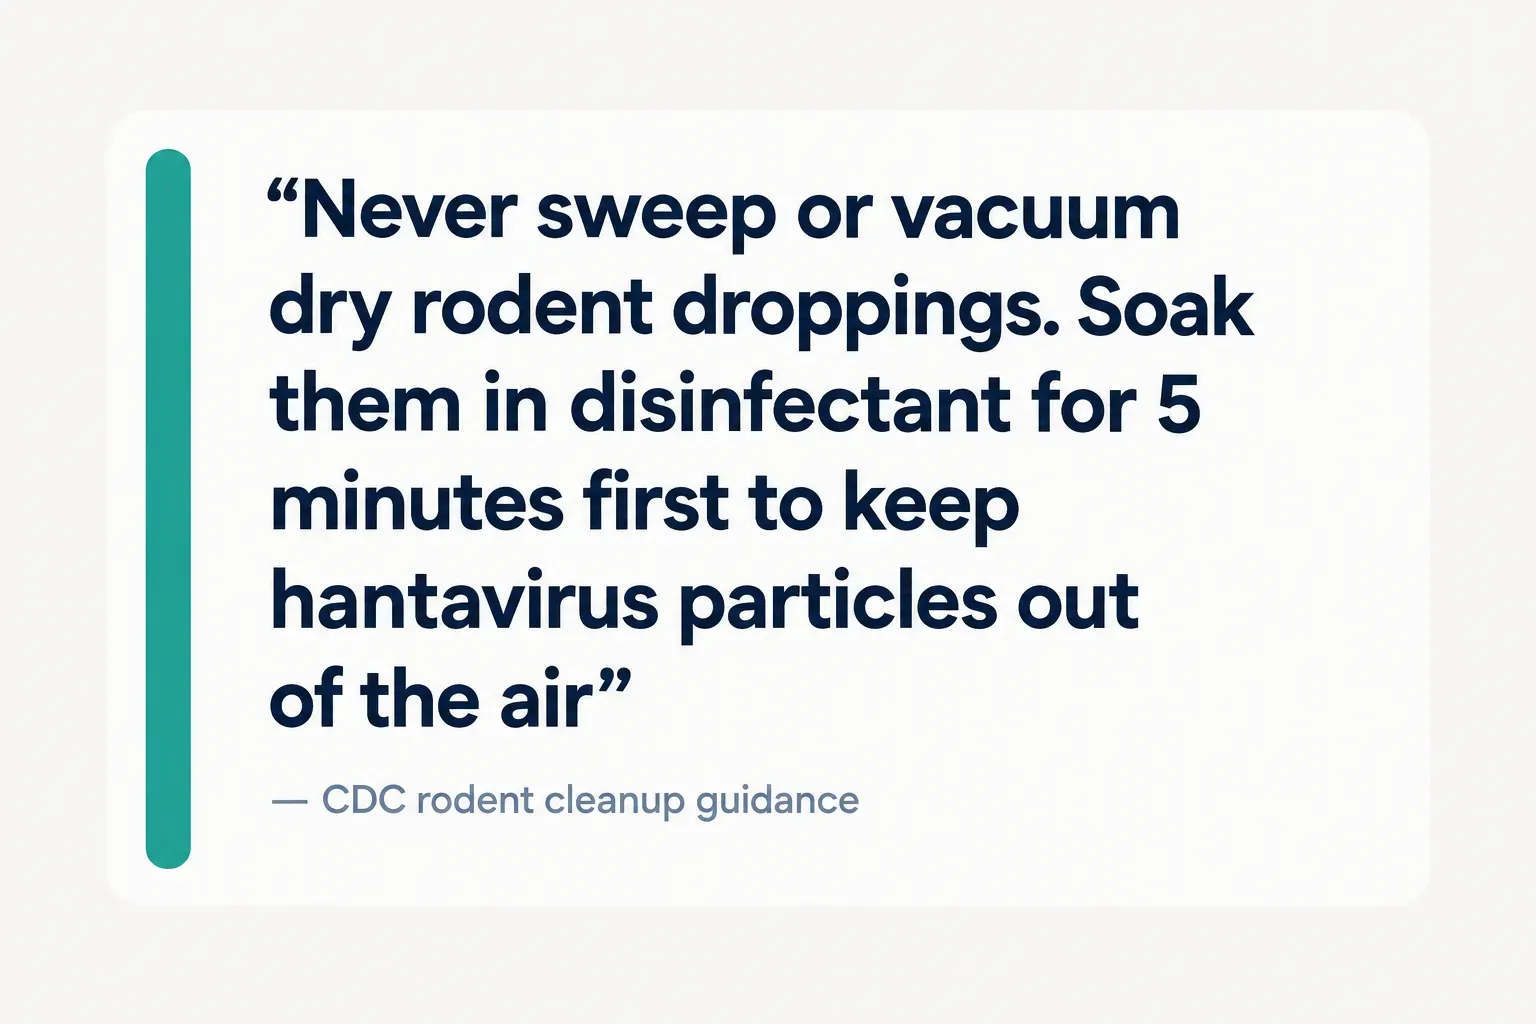
- Spray, don’t sweep. Soak droppings, urine, and nests with a disinfectant or a bleach solution (1 part bleach to 10 parts water) and let it sit for 5 minutes. Never sweep or vacuum dry droppings.
- Wipe and bag. Pick up waste with paper towels, place it in a plastic bag, seal it, and put that bag inside a second bag.
- Disinfect surfaces. Mop floors and wipe counters, cabinets, and drawers with disinfectant. Wash bedding or fabric in hot water.
- Clean yourself. Disinfect gloves before removing them, then wash your hands thoroughly with soap and warm water.
Confirm it’s gone, then keep it gone
The quiet after the last catch is misleading.
Rodents don’t announce their departure, and a few survivors can rebuild a population in a couple of months.
Verification turns “I think it’s over” into “I know it’s over.”
How to verify the infestation is over
Start by cleaning up every old dropping using the method above.
This creates a blank slate.
Any new droppings that appear afterward are unmistakable proof of ongoing activity, rather than leftovers you can’t date.
Next, check your sealed entry points weekly. Look for fresh gnawing on caulk, displaced steel wool, or new holes nearby.
Rodents will test your repairs, especially in the first few weeks.
Keep traps set and check them daily, then every few days as activity drops.
A smart trick is to dust a thin layer of flour or talc along a suspected runway. Fresh footprints or tail drags tell you instantly whether anything is still moving.
The finish line is clear: a full seven consecutive days with zero fresh droppings, zero trap activity, and no bait consumption. Until you hit that mark, keep going.
Recurring infestations often come from sources most guides overlook.
In apartments and townhouses, shared walls connect your unit to your neighbors’, and rodents travel freely through wall voids and plumbing chases. Roof and utility access shared with adjoining units works the same way.
Outside, look beyond your own yard.
A neighboring restaurant dumpster, a compost pile two houses down, an overgrown vacant lot, or a neighbor’s bird feeder can supply a steady stream of new rodents.
If you live in a multi-unit building, coordinate with your landlord or HOA, because treating one unit alone rarely holds.
When DIY isn’t enough
Some situations are beyond a weekend project, and pushing through them can cost more than a professional visit.
Rodents inside HVAC systems or ductwork can spread contaminated air throughout the house. Rodents in sealed wall voids often require opening drywall to reach nests and remove carcasses.
Heavily contaminated insulation is another red flag.
Attic insulation soaked with urine and full of droppings usually needs to be removed and replaced, which is a hazardous job requiring protective equipment and proper disposal.
Call a professional if you’ve had repeated trapping failures after two to three weeks of correct placement and pre-baiting.
The same goes for suspected electrical gnaw damage; rodents are believed to cause a meaningful share of house fires of unknown origin by chewing wiring insulation.
Finally, if your household includes infants, elderly residents, or anyone immunocompromised, the health risk from droppings justifies professional help sooner rather than later.
Choosing a trustworthy local provider
Not every pest company does real rodent control.
Some just set bait boxes and leave, which means you’ll be calling them back… repeatedly.
Asking the right questions upfront separates thorough providers from the rest.
Ask about inspection scope: will they check the attic, crawl space, roofline, and exterior, or just the rooms where you’ve seen activity? Ask what exclusion repairs they propose, which materials they’ll use, and whether repairs are included or quoted separately.
Ask about sanitation, including droppings cleanup and insulation removal if needed. Ask which products they plan to use, where they’ll place them, and how they ensure label compliance around children and pets.
A good provider explains this without hesitation.
Finally, get the details in writing.
That means a written guarantee with clear terms, documentation of what they found and fixed (photos are a good sign), and scheduled follow-up visits to check traps and repairs.
One visit is rarely enough for a real infestation.
Finding someone reliable is easier when you can see their track record.
Apps like Frendex let homeowners compare verified local providers based on reviews from completed jobs, view transparent pricing and listed services on each provider’s profile, and book a follow-up inspection directly.
That beats cold-calling unknown numbers and hoping for the best.
The one habit that keeps rodents out for good
No trap or poison comes close to the impact of sealing entry points.
Not even close.
Every gap you close permanently is one fewer route for the next rodent looking for warmth and food.
Keep your decision rule simple.
If you see fresh droppings today, start trapping tonight and recheck your seals this week.
If you’ve had zero activity for a full week, shift into prevention mode with a quick inspection every quarter.
Then make it a habit.
Schedule an exterior check every fall, before rodents move indoors for winter, and again every spring, after weather and settling have opened new cracks.
Thirty minutes with a flashlight and a pencil, twice a year, is the cheapest rodent control there is.
Frequently asked questions
What is the fastest way to get rid of rodents?
The fastest way to get rid of rodents is to combine exclusion with aggressive trapping near confirmed activity. Seal entry points first so no new rodents arrive, then set many traps along walls where you've found fresh droppings. Bait alone is slower and less predictable, and most DIY cases resolve in 1 to 3 weeks with this approach.
What smells do mice and rats hate?
Mice and rats are briefly repelled by strong smells like peppermint oil, ammonia, and predator urine, but none of these are reliable control methods. The scents fade within days, and rodents quickly habituate when food and shelter are available. Use them only as minor deterrents alongside sealing and trapping.
Is it better to use mouse traps or poison?
Traps are generally better indoors because they're safer and allow immediate removal of the rodent. Poison carries secondary poisoning risk for pets and wildlife, and poisoned rodents often die inside walls, causing odor problems. Rodenticides work best as an exterior option inside locked, tamper-resistant bait stations, used strictly according to the label.
How do you know when all the mice are gone?
You know all the mice are gone when you've had at least 7 consecutive days with zero fresh droppings, no bait consumption, and no trap activity. Clean all old droppings first so new ones are easy to spot. Keep checking sealed entry points for fresh gnawing during that week.
Can mice come back after pest control?
Yes, mice can come back after pest control, especially if entry points weren't sealed or attractants weren't removed. Treatment removes the current population, but unsealed gaps invite new ones, particularly in fall when rodents seek warmth. Ongoing monitoring and seasonal inspections are required to keep them out.
How much does professional rodent control usually cost?
Professional rodent control cost depends on infestation severity, property size, and whether exclusion repairs are included. An inspection and initial treatment often runs in the low hundreds, while full exclusion work, attic cleanup, or insulation replacement can add several hundred to a few thousand dollars. Always get a written scope of work before booking.
Need a hand with something?
The Frendex map shows you who is available near you, in real time.
Get the app free Get the app freeFree, no card needed
Related articles

Pest control cost in 2026: What you'll really pay
Real 2026 pricing for one-time visits, recurring plans, and termite or bed bug jobs. Learn what drives $95 vs $1,400 quotes before you sign.

Boiler maintenance: A homeowner's safety and service guide
Learn which boiler checks are safe to DIY, which need a pro, and the warning signs that mean call for help now. A homeowner's framework for 2026.
Emergency electrician: What to do before help arrives
Smell burning or see sparks? Get the 3-call decision tree (911, utility, or electrician) plus a prep checklist for faster, safer help.